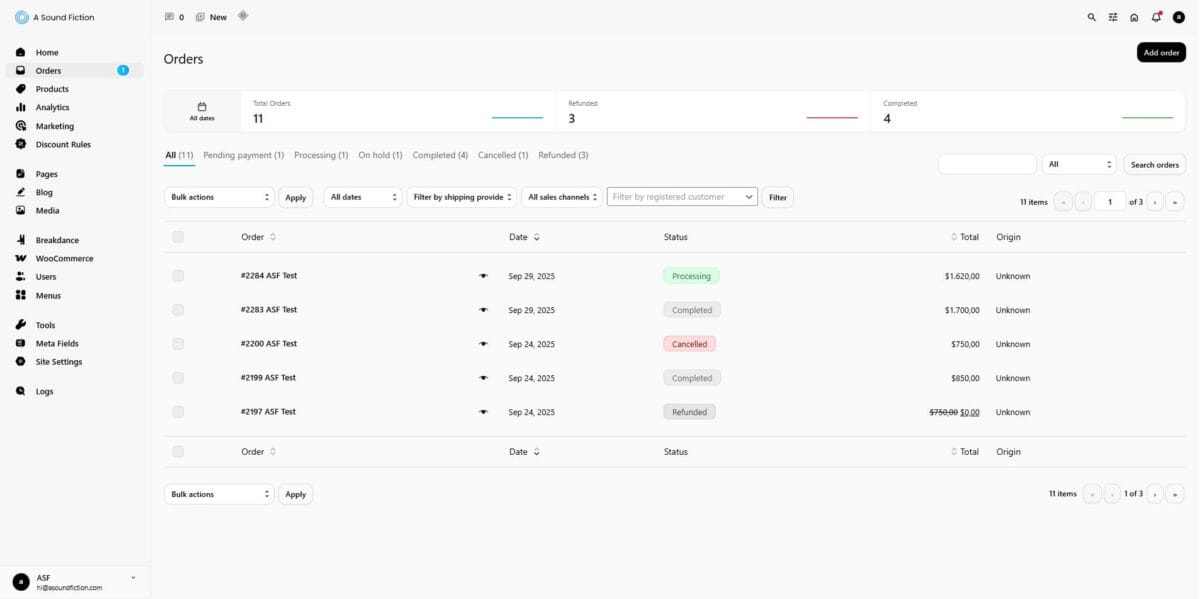
This section lists all orders placed on your site.
At the top, there is an Add Order button. You can create a new order on behalf of your customer from here.
In this list, you will see the following information:
Order: Displays the unique number of each order (e.g., #2192).
Date: Indicates the date the order was created.
Status: Shows the current stage of the order (Pending Payment, On Hold, Processing, Completed).
Total: Displays the total amount of the order.
Source: Indicates the channel from which the order was received; for example, Instagram, Google organic search, or Google Ads, depending on where the customer came from.
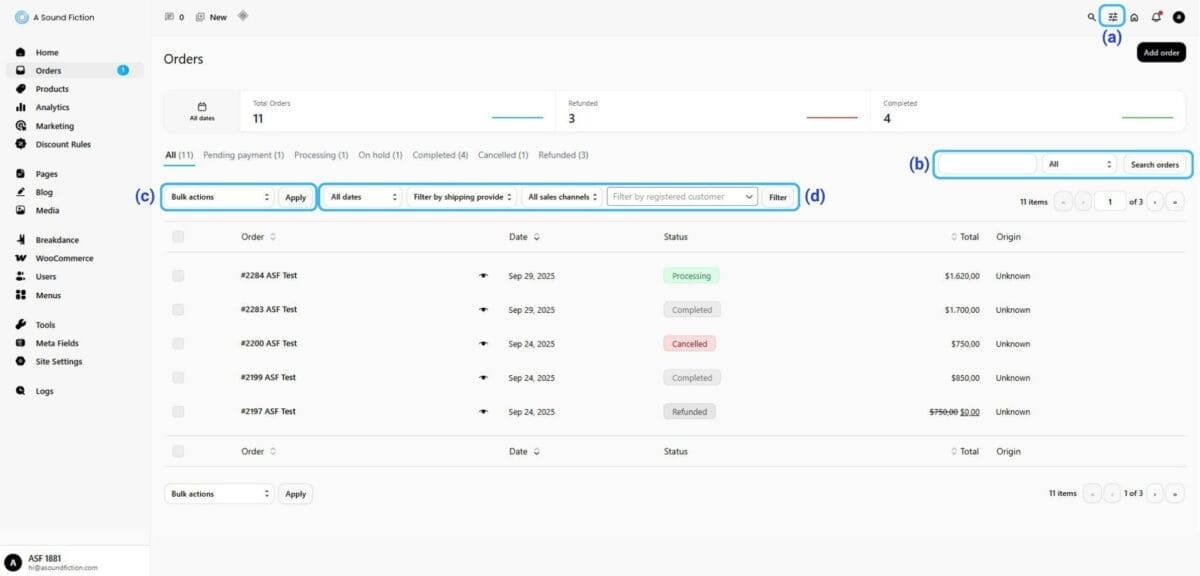
Actions available on the list:
Screen Options
Search Bar
Bulk Actions
Filtering
2.1 – Screen Options
With the “Screen Options” section, you can customize which information is displayed and how it appears in the “All Orders” list.
Columns: Choose which columns to display (Order, Date, Status, Billing, Ship to, Total, Actions, and Origin).
Pagination: Set how many items will be listed per page.
Tip After adjusting your screen settings, you must click the “”Apply” button to save them.
2.2 – Search Bar
Allows you to quickly find a specific order. You can search by Order ID, Customer Email, Customers, Products, or All.
2.3 – Bulk Actions
The Bulk Actions area allows you to manage multiple orders at the same time. From here, you can bulk delete selected orders or change their order status.”
For example, if you want to change the status of multiple orders to ‘Cancelled’
Select the orders you want to change.
Apply Bulk actions > Change status to Cancelled.
Click the “Apply” button.
2.4 – Filtering
You can filter the list by Date, Sales Channels (Admin, Checkout or Point of Sale), or Registered Customer.
2.5 – Order Details & Editing
When a customer places an order on your website (for example, via Bank Transfer or Credit Card).
The order is automatically recorded in the system by WooCommerce.
When a new order is created, the system automatically sends a notification email both to your customer and to you (the e-commerce site administrator). This email includes:
Ordered products
Selected payment method
Shipping address
Other order details
Additionally, to view the order details from the admin panel:
From the admin menu on the left, click on “Orders“. A list of all your orders will appear.
From this list, select the order you want to view or edit (e.g., #2192 ASF Test). The details of that order will appear. From here, you can review the following information about the order:
Payment method used
Customer IP address
Order date and current status
Billing & Shipping details
Customer email and phone number
Purchased product information
Customer history
Order notes
2.5.1 – Order Statuses
The system assigns a status to show which stage each order is in. See the meanings below:
Pending payment: The customer placed the order but payment hasn’t been made or confirmed yet.
Processing: Payment has been received successfully; the order is being prepared.
On hold: Payment is not completed or awaiting confirmation; stock is reserved but action is pending.
Completed: The order has been created, paid, and fulfilled/shipped.
Cancelled: The order was cancelled by the customer or by you. Stock is returned (if stock management is enabled).
Refunded: The order was cancelled and the customer has been refunded.
Draft: Orders created only by the store admin from the panel that don’t yet have a status. Not visible to the customer; no emails are sent and there is no stock/report impact. WooCommerce does not delete these automatically.
2.5.1.1 – Initial Status of an Order
The initial status depends on the payment method used:
a- Bank Transfer / EFT (methods without automatic verification) Payment must be checked manually by you (e.g., via your banking app). The system starts such orders as On hold.
b-Cash on Delivery Since payment will be taken upon delivery, the system starts the order as Processing.
c- Credit Card / Payment Gateway (methods with automatic verification) Payment is approved instantly, so the order automatically starts as Processing.
a) Payment via Bank Transfer / EFT
Since the standard system does not have a direct connection with banks, it cannot automatically detect whether the payment has been received.
Therefore, orders are automatically set to the “On Hold” status.
In this case:
Check your bank account manually.
If payment is received, open the order details.
Change the status to “Processing“.
Click the Update button.
Tip When you change the order status, the system automatically sends a notification email to the customer.
b) Cash on Delivery
Even though payment isn’t taken at checkout, WooCommerce starts the order as “Processing“.
The reason for this is that Cash on Delivery is considered by the store as a ‘guaranteed payment method.’ In other words, the system assumes that the customer will make the payment and processes the order directly.
The process works as follows:
Processing: The order starts here when it’s created. (Stock decreases; the product is prepared.)
After delivery, check that payment was collected.
If payment was collected, open the order.
Change the status to “Completed“. If the customer does not accept the product, change the order status to “Cancelled“.
Click the Update button.
Tip This means that starting with the “Processing” status instead of “On Hold” is WooCommerce’s special default setting for Cash on Delivery.
c) Credit Card Payment
Credit card payments are approved automatically by the system.
The order starts directly as Processing.
💡 At this stage, the system automatically sends an order/payment confirmationemail to the customer.
In short:
Bank Transfer / EFT → starts On hold; you verify manually.
Cash on Delivery → starts Processing; you verify manually after delivery.
Credit Card → starts Processing automatically because payment is approved.
Tip Regardless of whether the payment method is Bank Transfer/EFT, Cash on Delivery, or Credit Card, when an order is created, the product stock is automatically reduced. This means that even if the order status is “On Hold” or “Processing“, the stock will already have decreased.
2.5.1.2 – Next Order Statuses
Orders start as On hold or Processing depending on the payment method. Then they can move through the following stages:
a) Completed
When the product is shipped or the service is delivered to the customer, the order status is updated to Completed.
Add a Shipment Tracking Number
When moving the order to the “Completed” stage, the customer can also be provided with the shipping tracking information. To do this, follow these steps:
Open the order details page.
On the right side, under the “Shipment Tracking” section, click the “Add Tracking Info” button.
In the panel that opens:
Enter the Tracking Number.
Select the Shipping Provider (e.g., UPS, DHL etc.).
Ensure the “Mark order as” field is set to Completed.
Click the “Fulfill Order” button.
Tip After this, the order moves from Processing → Completed, and the system emails the customer with the tracking details.
b) Cancelled
If the order is canceled before being shipped due to the customer’s request or a stock/payment issue, the order status is updated to Cancelled.
Open the order details.
Set Status to “Cancelled“.
Click the “Update” button.
Tip The system automatically sends an email to the customer notifying them that their order has been cancelled.
c) Refunded
If the customer returns the product after delivery or a refund is required, set the status to Refunded.
Steps:
Go to the order details page.
Perform the “Refund” action.
After the refund is processed, the order status is automatically updated to “Refunded“.
Processing the Refund
Changing only the status is not enough—the amount must be returned to the customer:
Go to the order details page.
Under the “Item” section, click the “Refund” button.
For the line item(s), fields for Qty, Total, and Tax will appear.
For a full refund of one item, enter 1 in Qty.
After filling in the refund details, review the transaction in the “Refund amount” section and click the “Refund $Xmanually” button.
If the payment method is Credit Card and your integrated gateway supports refunds, the refund will be processed automatically. Please note that the rules and timelines depend on your provider.
For Bank Transfer/EFT payments, you must manually issue the refund to the customer via your bank, and then update the system.
After refunding, verify the transaction in your payment provider’s dashboard.
Note The system automatically sends an email to the customer indicating that the order has been refunded.
d) Failed
If the payment cannot be completed for any reason, the order status becomes Failed.
When does this happen?
Credit card is declined
Bank authorization is not received
The customer abandons checkout during payment
What should the admin do?
Open the order details page.
Check the payment method and the reason for the error. At this step, you can review the “Order Notes”.
At the bottom right of the order details page, you will find the “Order Notes” section. This area lists a record of all events, allowing you to track every activity.
If necessary, contact the customer and suggest an alternative payment method.
If the transaction cannot be completed, the order will remain in the Failed status.
You must periodically review and update the order status to “Cancelled”. Otherwise, the stock will not be replenished.
2.5.2 – Order Notes
The Order Notes area records all important updates and changes throughout the order’s lifecycle. Both admin actions and system actions appear here.
Adding a Note
Private note: These notes are only visible to you and are not sent to the customer. (Suitable for internal communication.)
Note to customer: These notes are shared with the customer. For example, if you enter “the delivery time has changed” here, the customer will be notified via email.
How to use?
On the order details page, find “Order notes“.
Enter your message in Add note.
Choose the note type (Private note or Note to customer).
Click the “Add” button.
Tip This is one of the most important sections for tracking order history and keeping a record of customer communications.
2.6 – Add Order
A manual order is used when a customer places an order through a different channel, such as by phone, email, or in-store, rather than directly on the website.
It is also useful for correcting incorrectly entered orders or recording special-price/bulk sales.
When a manual order is created, stock is automatically reduced just like with regular orders.
This allows you to track all orders from a single panel.
Steps to Add a Manual Order
On the “Orders” page, click the “Add Order” button.
Fill in Billing and Shipping details.
The order is initially recorded automatically with the status “Pending Payment“.
In the Customer area:
With the Guest option, you can create an order without registering a user.
With the Registered User option, you can link the order to an existing user.
In the “Item” section, click the “Add item(s)” button.
In the panel that opens, choose Add product(s) to select product(s).
Click Add to confirm the selection.
After entering all general and item details, click the “Create” button in the right panel.
After payment is confirmed, update the order status to Processing.
Note Stock is also reduced automatically for manually created orders.
2.6.1 – Add Item
The “Add Item” section in the order details allows you to add new products, additional fees, shipping costs, or taxes to the order. This section enables you to manually update the order total as needed.
To add an item:
When creating an order, click the “Add Item” button in the “Item” section.
Choose from the panel:
Add product(s): Used to add products to the order. Selected from stock. Add fee: Allows you to add an extra charge independent of a product (e.g., packaging fee). Add shipping: Used to add shipping or delivery costs. Add tax: Allows you to add an additional tax line if needed. Cancel: Cancels the action. Save: Applies your additions to the order.
Click the Add button to add it to the order.
Then, click the “Update” button at the top right of the page.
2.6.2 – Apply Coupon
If you want to apply a discount to the customer, click the “Apply Coupon” option on the order details screen.
Enter the existing coupon code in the field that appears and click the “OK” button.
The coupon will be automatically reflected in the order total.
Then, click the “Update” button at the top right of the page.
Can't find the answers you're looking for? We're here to help.
We Ask for Your Consent for a Better Experience We use cookies to ensure our website functions properly, personalize content and ads, provide social media features, and analyze site traffic. We also share information about your use of the site with our social media, advertising, and analytics partners.
Functional
Always active
Technical storage or access is strictly necessary for a legitimate purpose in order to provide a specific service explicitly requested by the subscriber or user, or to transmit a communication over an electronic communications network.
Tercihler
Teknik depolama veya erişim, abone veya kullanıcı tarafından talep edilmeyen tercihlerin saklanmasının meşru amacı için gereklidir.
Statistics
These cookies help us optimize our website. By allowing us to use these cookies, we can learn which pages our users enjoy browsing the most and which products are the most popular. Some of these cookies are provided by companies located outside the country. If you enable the use of these cookies, your personal data processed through the cookies will be transferred abroad.These cookies help us optimize our website. By allowing us to use these cookies, we can gain insights into which pages our users enjoy visiting the most and which products are the most popular. Some of the providers of these cookies are located abroad. If you enable the use of these cookies, your personal data processed through cookies will be transferred abroad.
Marketing
These cookies are used to help prevent you from seeing irrelevant ads. They are also used to display A Sound Fiction ads based on the products you browse, search for, or purchase when visiting other websites. Some of the providers of these cookies are located outside the country. If you enable the use of these cookies, your personal data processed through the cookies will be transferred abroad.