The Tools section is used to import/export site data and manage user data.
14.1 – Import
Allows you to upload content (pages, posts, media, etc.) from another site or system into your site.
14.2 – Export
Allows you to export many types of content — such as pages, posts, categories, products, variations, orders, refunds, coupons, or media files — in XML format. This file can then be imported into another WordPress site.
14.3 – Export Personal Data
Exports a user’s personal data (name, email, etc.). Used when a user requests their data.
Steps to export personal data:
From the left menu, go to Tools > Export Personal Data.
Enter the email address (preferred) or username of the person whose data will be exported.
Leave the send “Confirmation Email” box checked (the user will confirm via email).
If you don’t want the confirmation process, uncheck the box (the admin approves directly).
Click the Send Request button.
The request will appear in the list below (with columns for Requester, Status, Requested, and Next Steps). The status will be Pending/Confirmed.
If you left the confirmation email checked, the user will receive an email and confirm the request by clicking the link. After confirmation, the status changes to Confirmed.
You can then either click “Download Personal Data” to download the file, or “Send Export Link” to email the download link to the user.
Available actions on the list:
Screen Options
Bulk Actions
Search Bar
14.3.1 – Screen Options
With the Screen Options menu, you can choose which columns are visible in this table and how many items are listed per page.
Columns: Here, you can select the headings you want to see in the table.
Requester: Shows which user the request was created for
Status: Shows the stage of the request (e.g., pending, approved).
Requested: Shows when the request was created.
Next Steps: Shows the actions that can be taken for this request.
Pagination: The number you enter in the “Number of items per page” box determines how many records will be displayed at once. Example: If you enter 20, up to 20 records will appear per page. If there are more records, they will be split into sub-pages.
Tip After setting your screen options, click the “Apply” button to save them.
14.3.2 – Bulk Actions
This section allows you to manage multiple user requests at the same time. Instead of performing actions one by one, you can apply selected actions to all requests collectively.
Resend Confirmation Requests: If a previously sent confirmation email did not reach the user or the user could not be found, you can resend the confirmation email.
Mark Requests as Completed: If you have processed a request and the process is finished, you can use this option to mark it as “completed.”
Delete Requests: Permanently deletes selected requests. This action cannot be undone.
Usage:
Select the requests you want to take action on.
From the “Bulk Actions” dropdown menu, select the action you want to perform.
Click the “Apply” button.
14.3.3 – Search Bar
Allows you to quickly find a specific request.
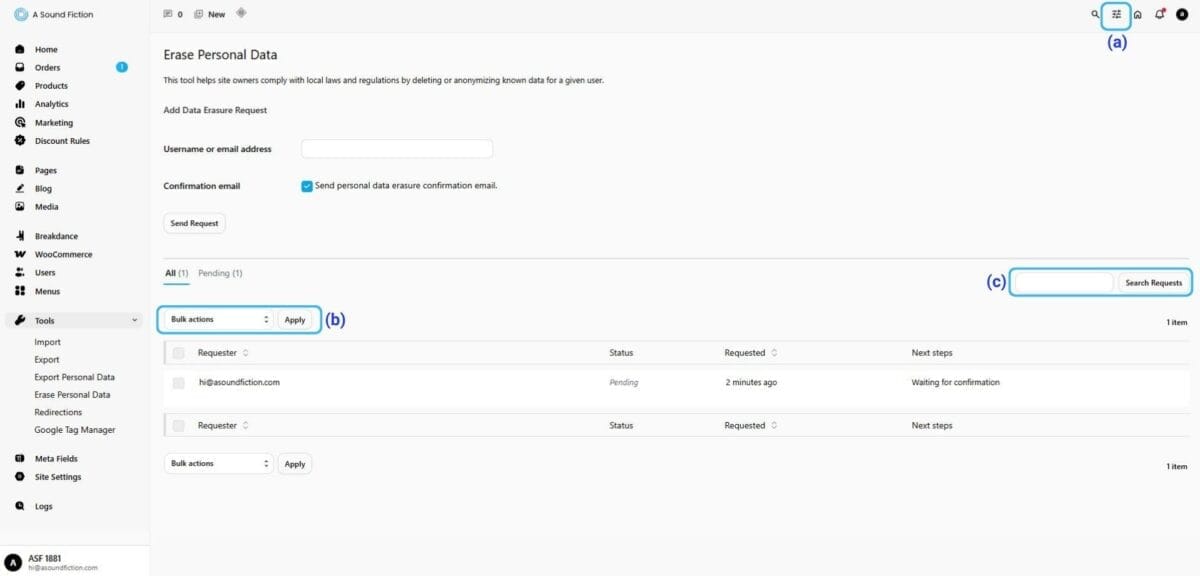
14.4 – Erase Personal Data
Allows you to permanently delete a user’s personal data.
From the left menu, go to Tools > Erase Personal Data.
Enter the email address (preferred) or username of the person whose data will be erased.
Leave the send “Confirmation Email” box checked (the user will confirm via email).
If you don’t want the confirmation process, uncheck the box (the admin approves directly).
Click the Send Request button.
The request will appear in the list below (with columns for Requester, Status, Requested, and Next Steps). The status will be Pending/Confirmed.
If you left the confirmation email checked, the user will receive an email and confirm the request by clicking the link. After confirmation, the status changes to Confirmed.
Click “Erase Personal Data” to complete the deletion.
Available actions on the list:
Screen Options
Bulk Actions
Search Bar
14.4.1 – Screen Options
The Screen Options menu allows you to select which columns are displayed and how many items per page.
Columns: Here you can select the headings you want to see in the table.
Requester: Shows for which user the request was created.
Status: Shows the stage of the request (e.g., pending, approved).
Requested: Shows when the request was created.
Next Steps: Displays the actions that can be taken for this request.
Pagination: The number you enter in the “Number of items per page” box determines how many records you will see at the same time. Example: If you enter 20, a maximum of 20 records will appear per page. If there are more records, they will be divided into subpages.
Tip After adjusting your screen settings, click the “Apply” button to save them.
14.4.2 – Bulk Actions
This section allows you to manage multiple user requests at the same time. Instead of performing actions one by one, you can apply them collectively to selected requests.
Resend Confirmation Requests: If a previously sent confirmation email was not delivered or the user could not be reached, you can resend the confirmation email.
Mark Requests as Completed: If you have processed a request and the procedure is finished, use this option to mark it as “completed.”
Delete Requests: Completely deletes the selected requests. This action cannot be undone. (This deletes the created request, not the personal data itself.)
Usage:
Select the requests you want to process.
From the “Bulk Actions” dropdown menu, choose the action you want to perform.
Click the Apply button.
14.4.3 – Search Bar
Allows you to quickly find a specific request.
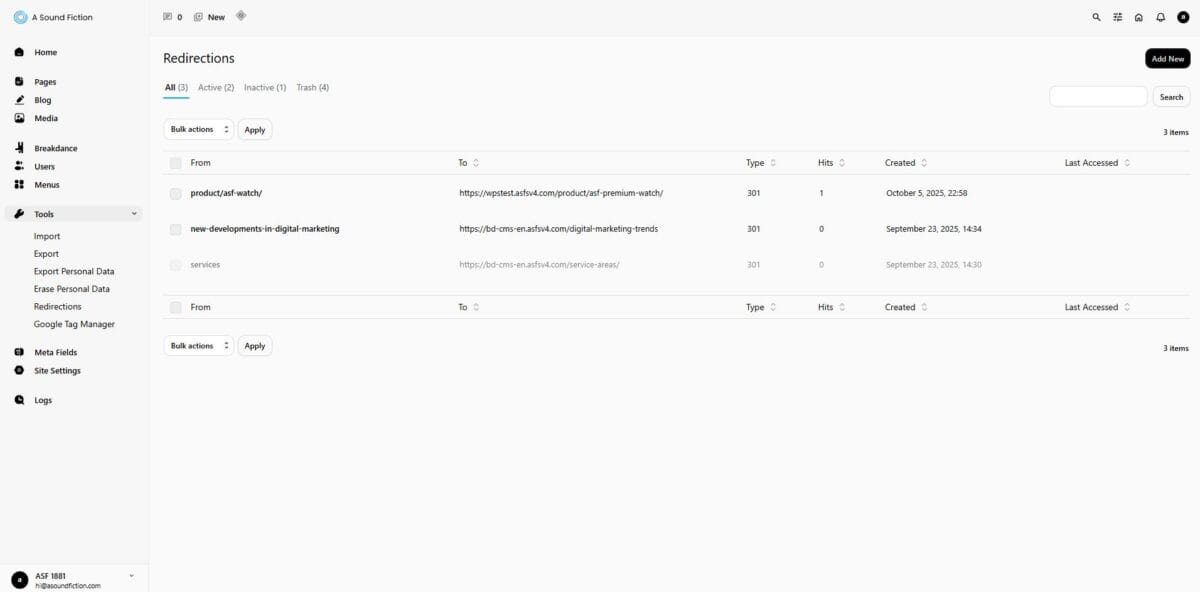
14.5 – Redirections
Redirects allow you to redirect old or broken URLs on your site to new pages. This prevents visitors and search engines from encountering 404 errors and helps preserve your SEO strength.
From the left admin menu, click Tools > Redirects.
A list of all your existing redirects will appear.
In this list, you will see the following information:
From: The URL being redirected (Old URL).
To: The URL the redirect points to (New URL).
Type: The type of redirect (e.g., 301 Permanent Redirect).
Status: Active/Inactive.
Hits: Shows how many times this redirect has been used.
Created: Shows when the redirect was added.
Last Accessed: Shows the last time the redirect was used.
14.5.1 – Adding a Redirect
To add a new redirect, follow these steps:
Step 1 – Go to the Redirects Section
In the admin panel, from the left menu, click Tools > Redirections > Add New.
Step 2 – Enter the Source URL(s)
Enter the Old URL you want to redirect. Next to it, choose from the following options:
Exact Match: This option will be selected by default; do not change unless you know what you are doing. The URL must match exactly for the redirect to work.
Contains: Redirects if the text you entered is contained within the URL.
Starts With: Redirects if the URL starts with the text you entered.
End With: Redirects if the URL ends with the text you entered.
Regex: For advanced, technical users. Allows capturing multiple URLs with a single rule instead of entering them one by one.
Also, check the “Ignore Case” option if you don’t want case sensitivity to matter.
Step 3 – Enter the Destination URL(s)
Enter the New URL you want the redirect to point to.
Step 4–Choose Redirect Type
At this step, since you are performing a permanent redirect, select “301 Permanent Move”. Other redirect types are not recommended unless you know exactly what you are doing.
Redirection Types
A redirect type determines what visitors and search engines should do when they try to access your old page.
301 Permanent Move: The old page no longer exists. Permanently sends visitors and Google to the new page. Recommended for SEO.
302 Temporary Move: The old page still exists but temporarily redirects to another page. Not recommended for SEO. Do not use unless you know what you are doing.
307 Temporary Redirect: Similar to 302, but performs the temporary redirect with stricter rules. Do not use unless you know what you are doing.
410 Content Deleted: Indicates the page has been completely removed and shows a “gone” message. If the page has been fully deleted, it informs search engines. Do not use unless you know what you are doing.
451 Content Unavailable for Legal Reasons: The page exists but access is blocked due to legal reasons. Do not use unless you know what you are doing.
Step 5–Select Status
Choose the “Active” option.
Step 6–Click the Add Redirection Button
Click the “Add Redirection” button to complete the redirection process.
If you decide not to proceed, you can cancel the operation by clicking the “Cancel” button.
Example: If you change the name of one of your products, it’s important to set up a 301 redirect for SEO purposes.
Old URL: https://www.yoursite.com/product/asf-watch
New URL: https://www.yoursite.com/product/asf-premium-watch
14.5.2 – Screen Options
Screen Options menu, you can choose which columns will be visible in this table and how many items will be listed per page.
Columns: Here you can select the headings you want to see in the table (e.g., To, Type, Status, Created, and Last Accessed).
Pagination: You can set how many redirect rows will be displayed at once (e.g., 100).
Tip After adjusting your screen settings, click the “Apply” button to save them.
14.5.3 – Bulk Actions
This section allows you to manage multiple redirects at once:
Activate: Enables selected inactive redirects.
Deactivate: Disables selected active redirects.
Move to Trash: Deletes selected redirects in bulk.
14.5.4 – Quick Actions
In the admin panel, go to Tools > Redirections.
Hover your mouse over the redirect you want to manage.
Choose the quick action you want to perform:
Edit: Opens the redirect settings, allowing you to change details such as source and target URLs.
Disable: Temporarily disables the redirect, making it inactive.
Trash: Deletes the redirect and moves it to the Trash.
View: Opens the redirect in a new tab so you can see how it works.
Can't find the answers you're looking for? We're here to help.
We Ask for Your Consent for a Better Experience We use cookies to ensure our website functions properly, personalize content and ads, provide social media features, and analyze site traffic. We also share information about your use of the site with our social media, advertising, and analytics partners.
Functional
Always active
Technical storage or access is strictly necessary for a legitimate purpose in order to provide a specific service explicitly requested by the subscriber or user, or to transmit a communication over an electronic communications network.
Tercihler
Teknik depolama veya erişim, abone veya kullanıcı tarafından talep edilmeyen tercihlerin saklanmasının meşru amacı için gereklidir.
Statistics
These cookies help us optimize our website. By allowing us to use these cookies, we can learn which pages our users enjoy browsing the most and which products are the most popular. Some of these cookies are provided by companies located outside the country. If you enable the use of these cookies, your personal data processed through the cookies will be transferred abroad.These cookies help us optimize our website. By allowing us to use these cookies, we can gain insights into which pages our users enjoy visiting the most and which products are the most popular. Some of the providers of these cookies are located abroad. If you enable the use of these cookies, your personal data processed through cookies will be transferred abroad.
Marketing
These cookies are used to help prevent you from seeing irrelevant ads. They are also used to display A Sound Fiction ads based on the products you browse, search for, or purchase when visiting other websites. Some of the providers of these cookies are located outside the country. If you enable the use of these cookies, your personal data processed through the cookies will be transferred abroad.